GARAGE NOTE
Same Angle, Better Comparisons: A Repeatable 1/64 Photo Method
Consistency before drama: a simple phone-based station and five-view sequence make ride height, proportions, wheels and release variations easier to compare over time.
QUICK ANSWER
For useful comparison photos, expensive equipment matters less than repeating the background, model position, camera position, light and shooting order. Add small removable position marks to a tabletop and photograph every miniature from five standard views: front three-quarter, side, rear three-quarter, overhead and underside. Keep this reference set separate from your more expressive hero photographs.
- Separate expressive hero images from repeatable reference images.
- Fix the background, model position and camera position with removable marks.
- Use the same five-view sequence for every model.
- Keep the device, lens, exposure approach and crop as consistent as practical.
- Record at least the model name and photography date with the files.
Separate “dramatic” from “comparable”
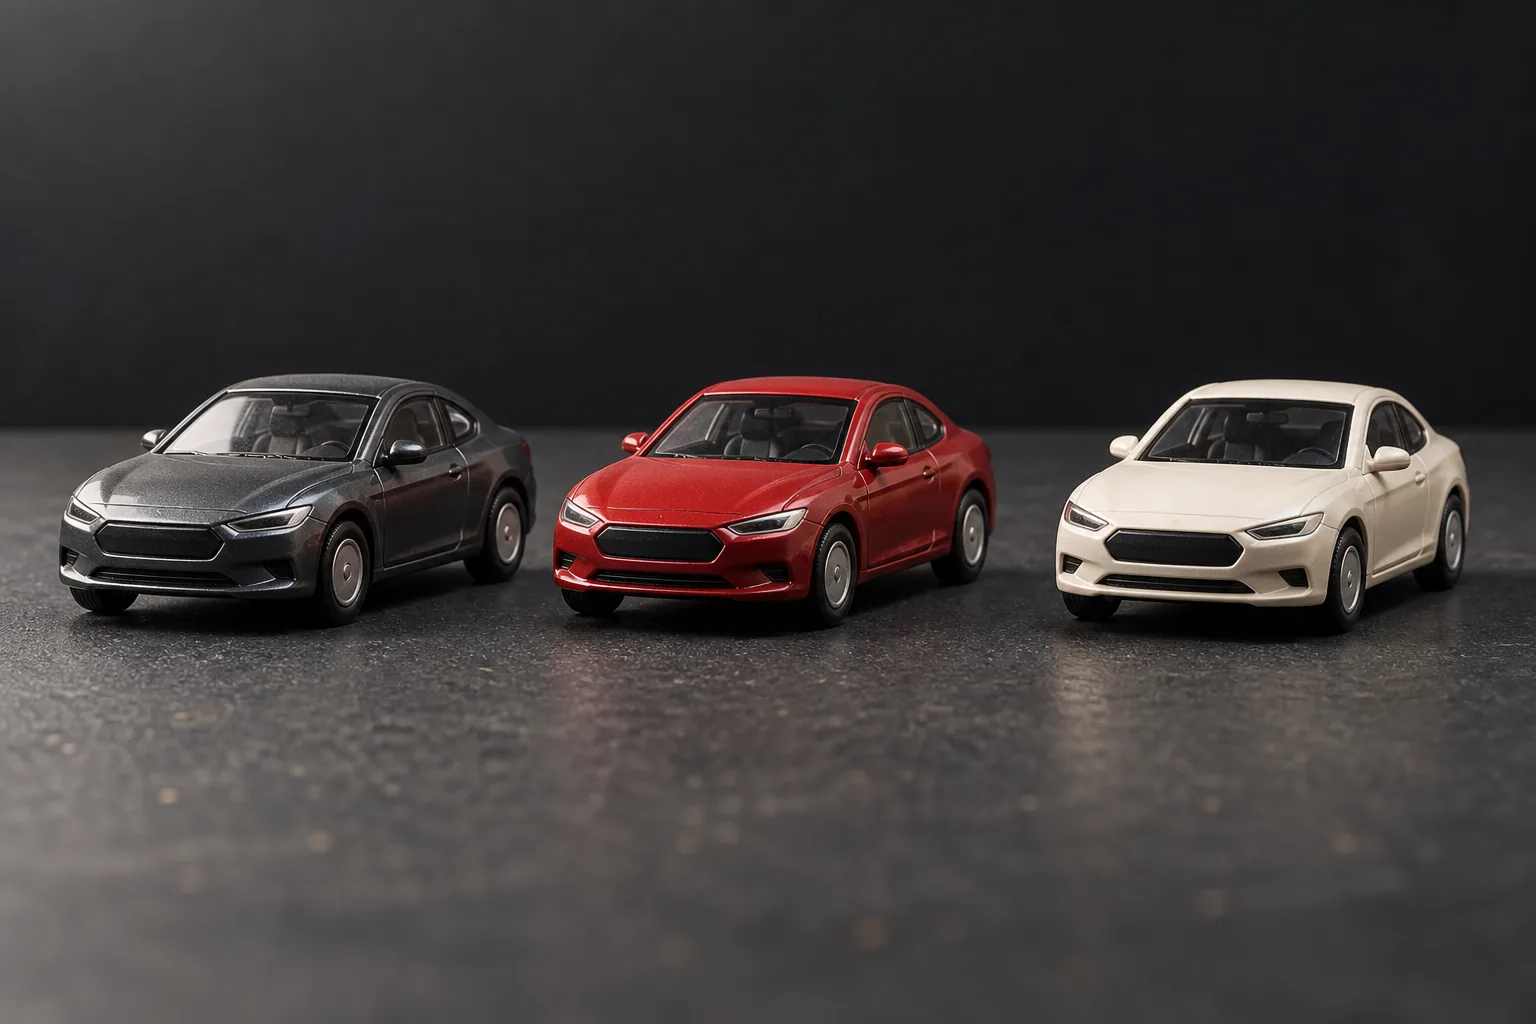
Low light, deep shadows and strong perspective can make one model feel exciting. The same choices make ride height or body-shape comparisons harder when they change from car to car.
Photograph a reference set first, then make the expressive images. The reference set is a consistent measuring view; the hero image celebrates what makes one model distinctive. Keeping both preserves evidence without removing the fun.
Build a fixed station in roughly 30 cm square
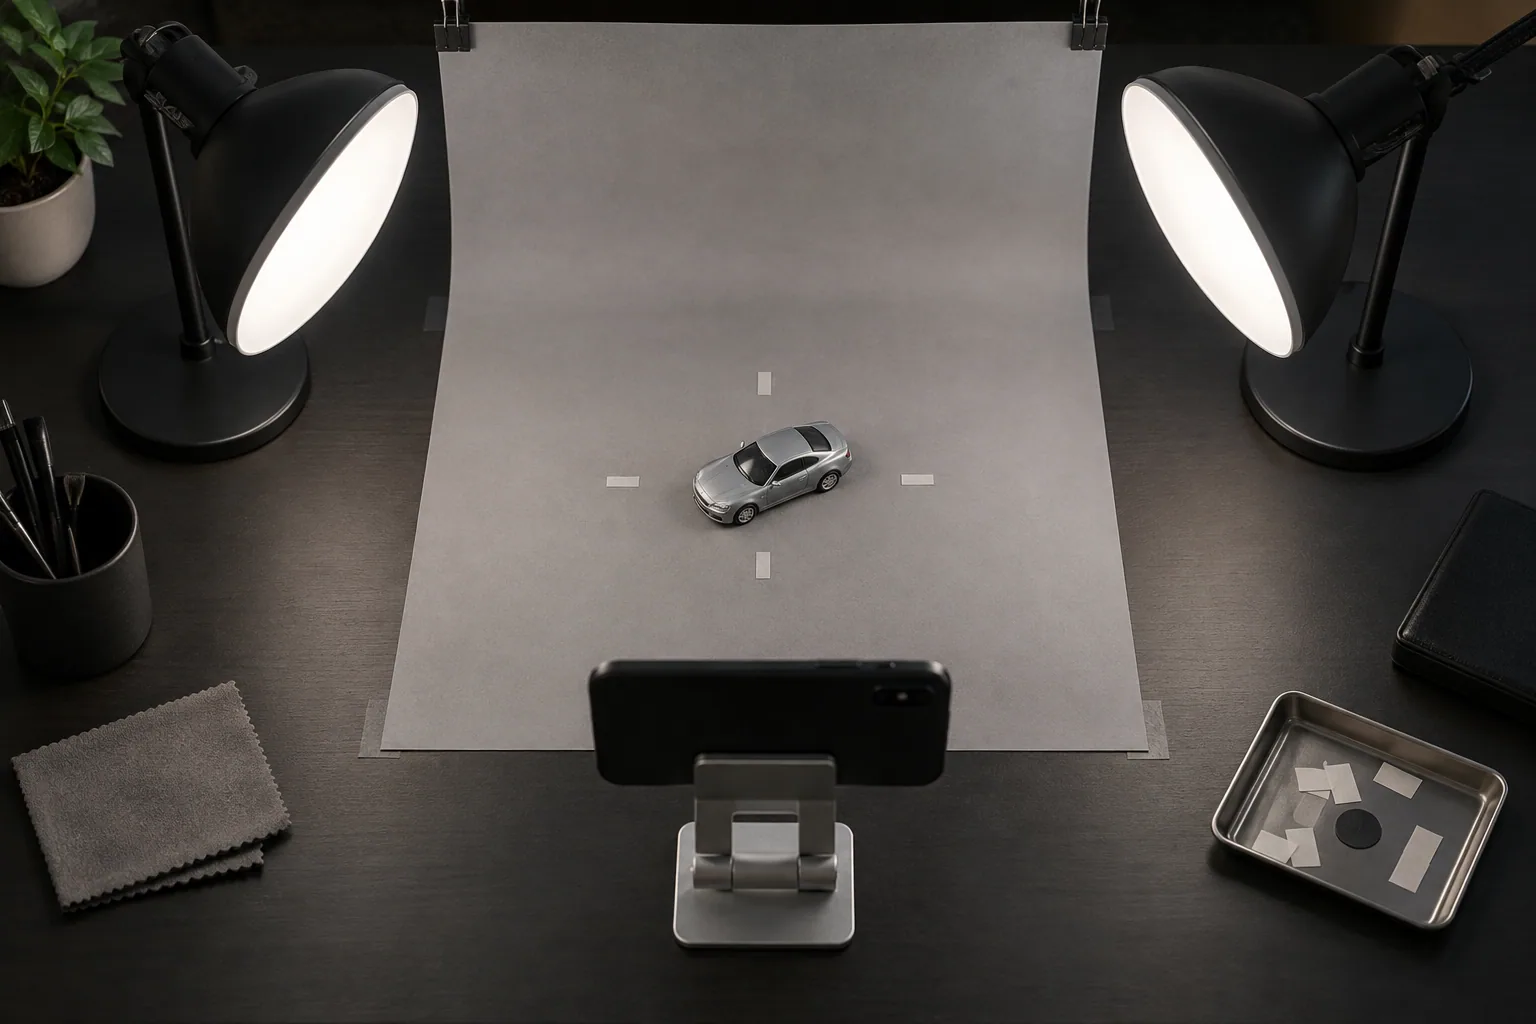
A large light box is optional. Use a plain low-reflection paper sweep and place small removable tape marks for the center of the model, a front-wheel position and the feet of the phone stand. If the station must be packed away, take one overhead setup photograph so you can rebuild it.
Use soft light from both sides or slightly forward, prioritizing a readable silhouette and wheels. Glossy bodies reflect the light source, so diffuse it through white paper or thin fabric while keeping every object safely away from the miniature.
Choose camera height and direction once
For the front three-quarter view, fix phone height, distance and horizontal angle. Move only the model between shots. This makes bonnet length, roof height and the tire-to-fender gap easier to compare.
An extremely close camera exaggerates the nearest end. Instead of relying heavily on digital zoom, step back slightly and apply the same crop ratio afterward. The goal is not mathematical perfection; it is a stable visual rule you can repeat.
Record five views in one fixed order
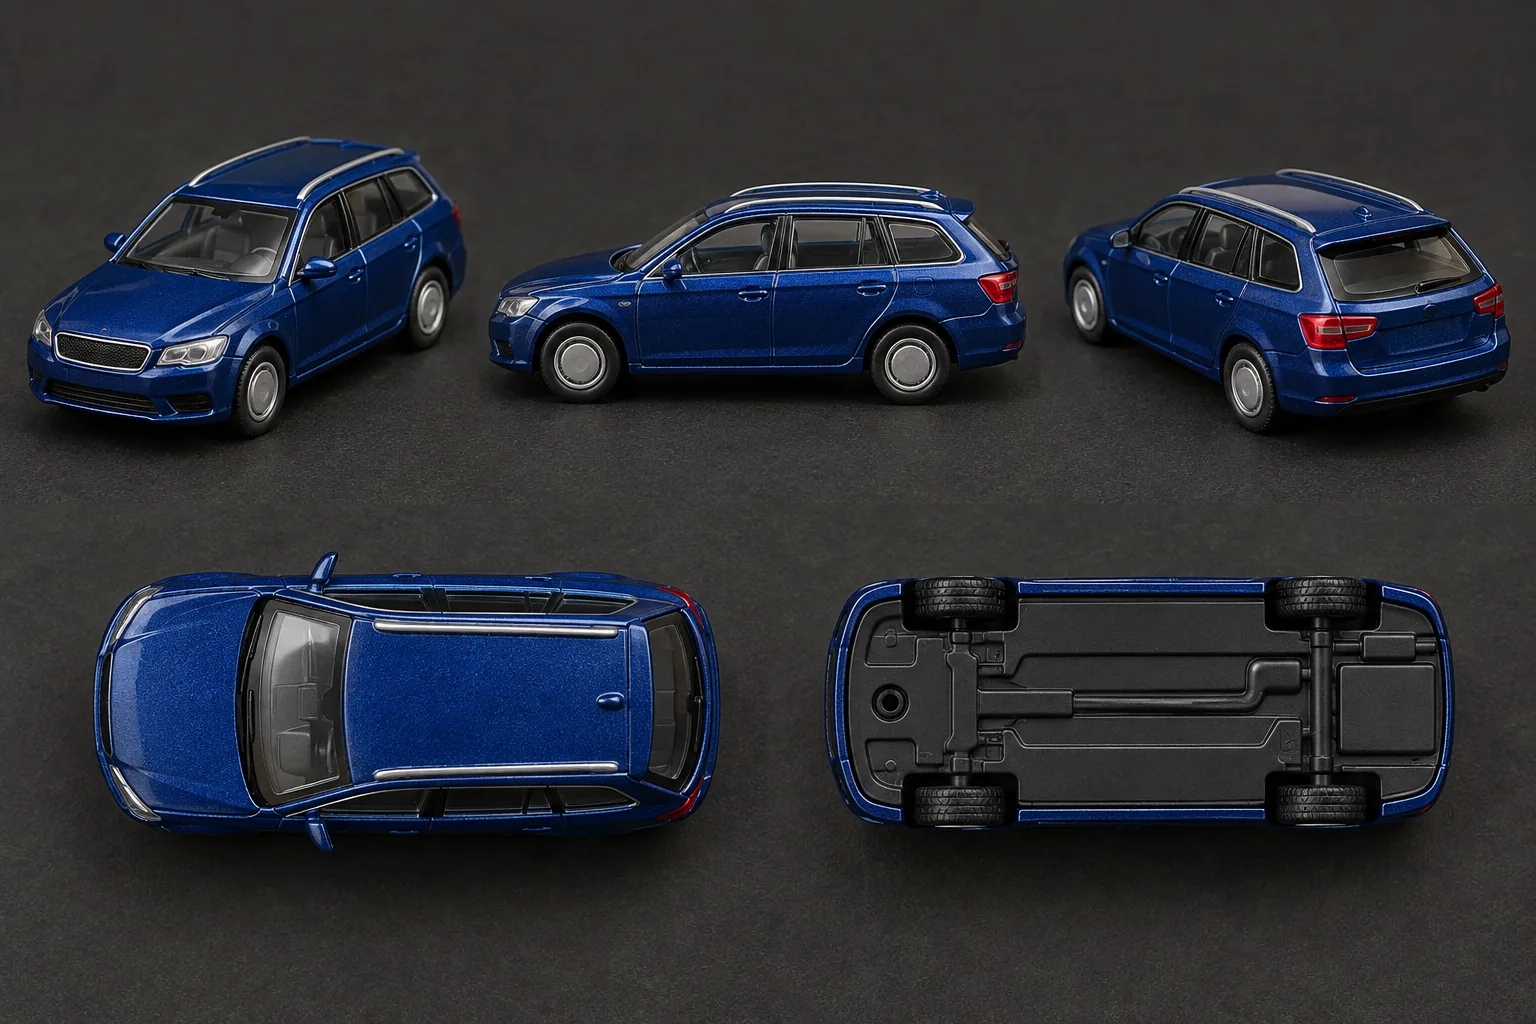
A practical sequence is front three-quarter, direct side, rear three-quarter, overhead and underside. Together they preserve the overall impression, wheelbase and ride height, rear form, cabin-to-body proportions, and base markings or material clues.
When turning a model over, avoid loading delicate mirrors, antennas or spoilers. Work over a clean soft surface. If an item number or molded line matters, add a close detail frame instead of trying to make the full underside image do everything.
Track changes instead of chasing perfect sameness
Daylight shifts and phone processing reacts to body color, so identical results are difficult. Record the device, lens, light source, background and crop ratio. Knowing what changed is more useful than pretending nothing did.
For color comparisons, temporarily place the same plain white or gray card at the edge of the frame. It provides an editing reference. The public crop can exclude it while the original file preserves the clue.
A ten-minute template for one model
- Dust the background and position marks.
- Record the model name and date.
- Shoot front three-quarter, side, rear three-quarter, overhead and underside.
- Check focus, clipped highlights and camera shake immediately.
- Apply the same crop ratio and retain the originals.
- Finish with one freely composed hero photograph.
NOTE — The value of a reference set is repeatability, not volume. Prefer a method simple enough to use again on the next model over a perfect setup you will not repeat.
Frequently asked questions
Can I make useful comparison photos with only a phone?
Yes. Consistent positions for the model, camera and light matter more than owning complex equipment. A small stand and removable position marks make the method easier to repeat.
Which background color works best?
Mid-gray often keeps both light and dark models readable, but clear parts and body colors behave differently. Choose white, gray or black after a short test, then keep that choice fixed during a comparison series.
The color changes between sessions. Is the method failing?
No. Daylight and automatic image processing vary. Record the device, light, background and edit conditions so the differences can be understood and reduced.
How many images are enough?
Use the same five basic views, then add close details only for markings or moving parts that need them. Consistency across models is more useful than a large random set.
About this note
This practical note is built around a repeatable observation or collection workflow and does not depend on a current product announcement. Any future addition involving release dates, specifications or news will identify its supporting source.
The procedure is presented as practical guidance, not as a universal product specification. We do not invent hands-on impressions of products we have not examined.